New Listing Guide
Creating a new listing on NEARN is a straightforward process. Below is a step-by-step guide for sponsors (projects or individuals) looking to post a gig and hire contributors.
Tips for a Successful Listing
- Be Clear – Avoid vague descriptions to attract the right talent.
- Set Realistic Budgets – Check similar gigs for competitive rates.
- Select the Right Type – Pick the right listing (bounty, project, sponsorship) depending on your needs.
Create a new Listing
Follow these simple steps to create a new listing:
1. Sign in
- Go to https://nearn.io.
- Click
Sign In(top right) and connect via:- Google account
- E-mail address
2. Create new listing
- Once logged in, click
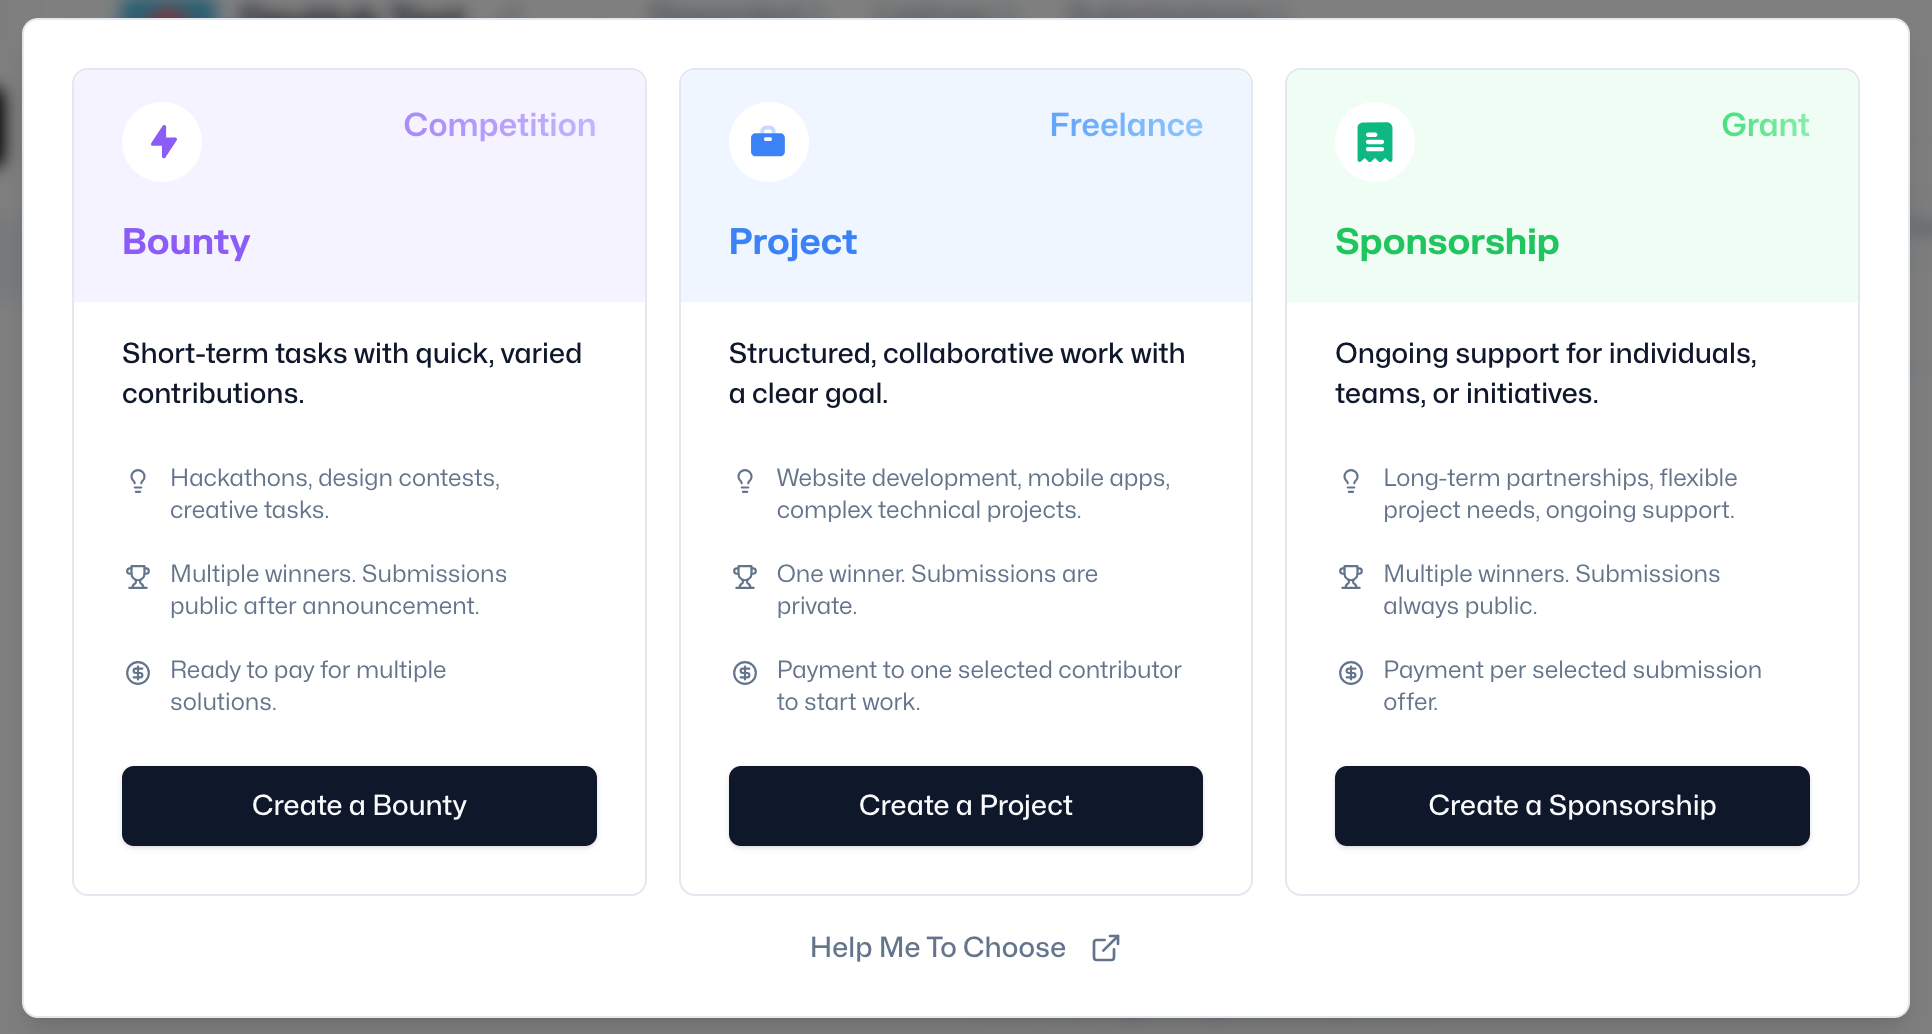
Create New Listing(in the top left navigation bar). - Select the listing type (bounty, project, sponsorship)
- Bounties can have multiple winners with prize distributions.
- Projects can only have one winner.
- Sponsorships can support multiple people (non-competitively).
3. Fill out details
You’ll need to provide:
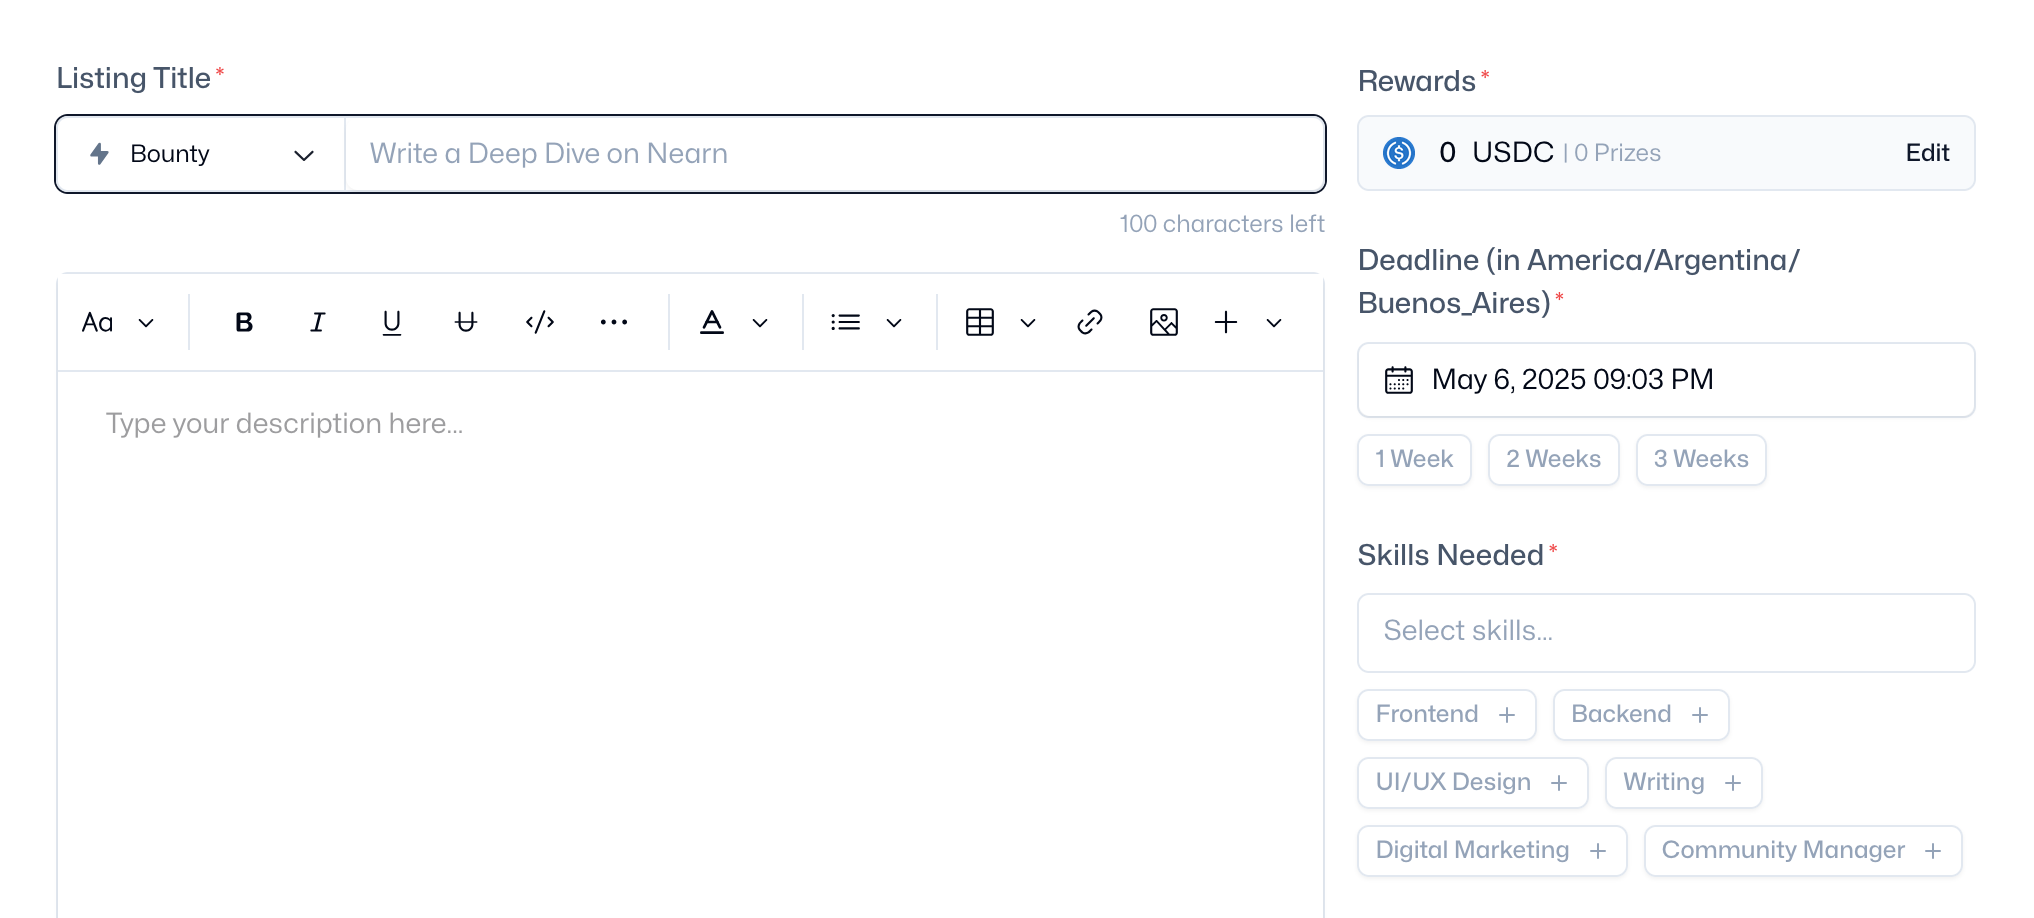
- Title: A clear listing title to attract contributors. (e.g., "Frontend Developer for DApp")
- Type: The listing type (Bounty, Project, Sponsorship)
- Description: Clearly explain the task, expectations, and deliverables. The rich text editor lets you customize the listing and add rich formatting for improved visual impact.
- Example:
"We need a React developer to build a frontend for our NFT tool. Must have experience with Next.JS and Wallet Selector."
- Example:
- Rewards: Specify the payout amount in USDC, NEAR, or another token.
- Bounties: you can set up a prize pool with any number of places (1st, 2nd, 3rd, ...) and additional bonus prizes.
- Projects: it can be a fixed compensation you decide, or applicants can send you quotes.
- Sponsorships: applicants can send you quotes of any amount.
- Deadline: Specific deadline when the listing ends, based on your timezone. (e.g., "2 weeks to complete")
- Skills Needed: Specify skills needed using a clear tagging system so the right talent can find your listing. (e.g., React, TypeScript, UI/UX)
- Point of Contact: Provide a clear point of contact for questions. (e.g.,
myemail@example.com) - Custom Questions: Add custom questions to your application forms to gather exactly the information you need from potential contributors. (e.g., "Are you a Web3 developer?")
When ready, click on the Continue button. (top-right corner)
4. Publish the listing
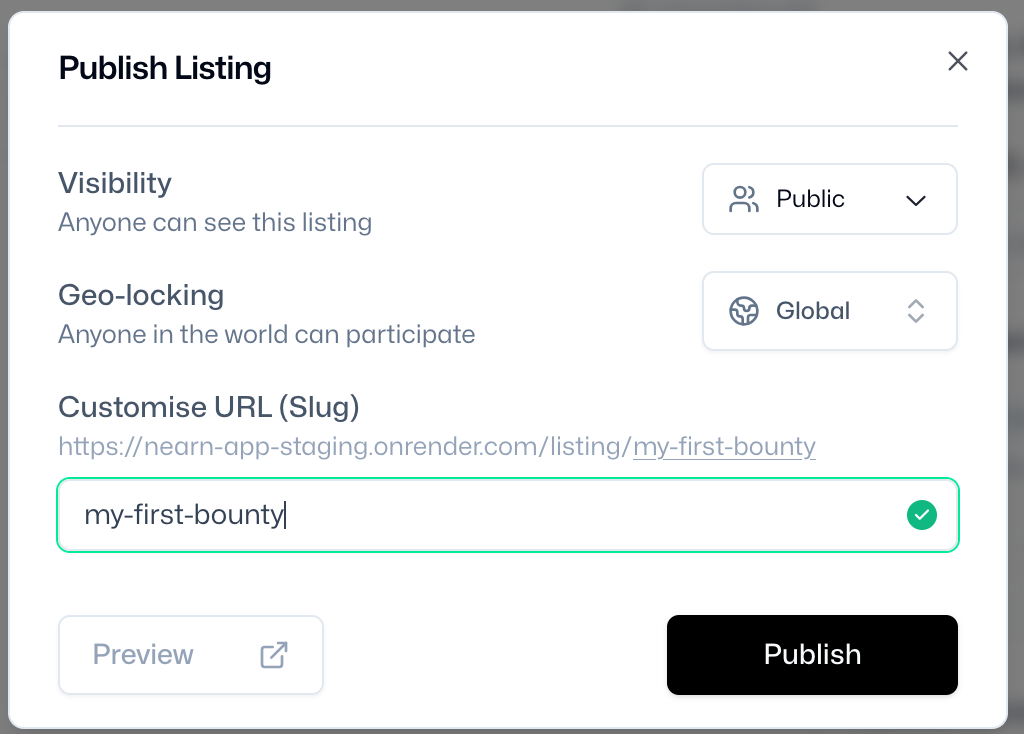
- Set the listing settings:
- Visibility: Public (discoverable across the entire NEARN platform) or Private (only accessible via the direct URL)
- Geo-locking: Make your opportunity available globally or restrict participation to specific countries
- Custom URL: A clean, user-defined URL (slug) to share the listing easily
- Review details and click
Publish. - The listing will go live, and contributors can apply.
What Happens After Posting?
- Applicants Submit Proposals – Contributors will apply or submit work directly (depending on listing type).
- Review & Select – You can message applicants and choose the best fit.
- Approve & Pay – Once satisfied, release payment.